Turning wood can be both satisfying and frustrating, whether you do it as a hobby or have expanded and (as in my case) using it for a source of income. With that expansion of experience also comes with an expansion of knowledge. Knowing which woods work best for which types of projects is a start, but knowing which types of glue work best for your turning needs is also valued knowledge as well.
The best type of glue for woodturning isn’t necessarily a single type for all projects, but more like a variety of glues to cover a wider variety of needs. The four most common and must-have glues for woodturning include:
- Wood Glue (Titebond Brand)
- Epoxy Glue
- Cyanoacrylate Glue
- Standard Glue Gun
Each type of glue has its own uses and unique properties, which I am going to explore look further with you and share brand examples that you may find you are familiar with, if not the type of glue in general. There are considerations to be made when using glues for turning, such as the purpose of the glue, the type of project you are working on, and the time frame you have to work with.
The Different Types and Their Properties
We will be taking a bit of a dive into the four types of wood glue. Each type relies on a chemical reaction to dry and, as such, will have significantly different drying and cure times.
Going from HPVA, which can dry in about 30 minutes, but will take a full day to cure, to cyanoacrylate, which can dry within moments. As your skills advance, knowing whether you fill an insect hole or you’re finishing a hand-turned pen, using the right type of glue is important.
For the Beginner and Beyond – A General Purpose Wood Glue
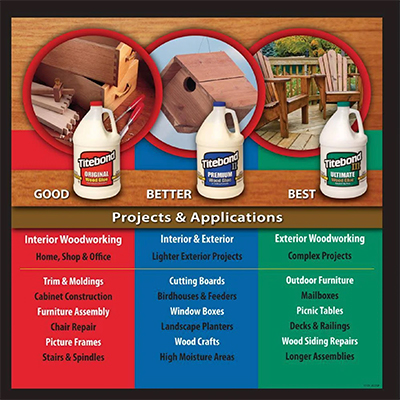
When you first start working with wood, the glue you want to invest in first would be in wood glue or Titebond brand glue. Although there are many other brands, Titebond offers a variety of specialty wood glues and they seem to be the most preferred brand among the woodworkers I know.
Whether you are doing a project in the home or to decorate the outside, Titebond glues tend to be optimal for general-purpose wood glue. With regards to woodturning, I find myself reaching for it when I simply have to glue two or more pieces together, as when I’m doing some kind of segmented bowl or vessel piece.
Some Titebond varieties are water resistant, making them a great option for outdoor use. While I would not recommend it for work that will be in a pool or in constant contact with water, it can handle a rainstorm or two without causing serious damage to the bond.
This has the added effect of having a lot of versatility both in and out of the home. In the home, it can also be used for “indirect food contact.” This phrasing may be a bit confusing, but the basics means that it can be used for a project that won’t come into contact with food but used in the kitchen.
The initial drying time is about 30 minutes, so you do have some wiggle room when it comes to clamping pieces together as well—fully cured in about 24 hours.
As Your Skills Advance – 2 Parts for a Faster Dry
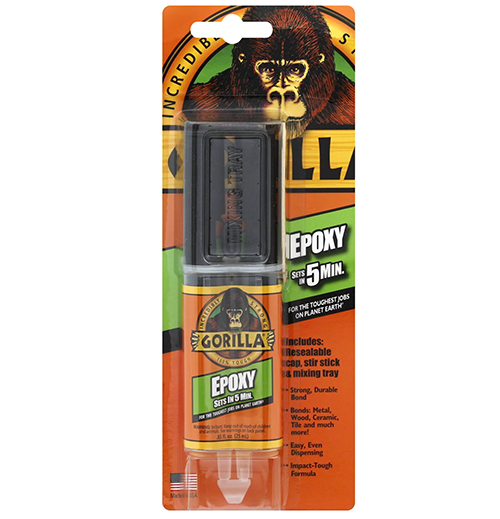
The second type of glue that I want to take a look at is epoxy glue. Epoxy glue is a 2 part product that has a base compound and an activator or hardener to start the chemical process. Probably some of the most well-known brands of epoxy glue are JB Weld, Bondo, and Gorilla. While some of these brands are more common for auto mechanic repair, they also make wood glue as well.
Epoxy, being a 2 part glue, means that you can get your parts ready without mixing until the moment you need them. One of the downsides is that once mixed, you do have a smaller window within which to work, once the 2 parts are mixed. Typically less than a 30 minute drying time, with a cure time of a couple of hours, but you don’t have to wait until fully cured to work with it.
One of the major upsides to epoxy is that it can be sanded, painted, and turned on the lathe, so it works well as a filler, should your pieces not come together as planned or if you have a crack or divot in your project. In my experience, it takes well to pigments and dyes too. The short drying time may be a challenge, especially if your adding color but it can be helpful in that you do not have to wait for a complete cure to further work with your piece at hand.
So while a quick drying time means that you can mix and use when you are ready to, then after a short break continue to finish your project; this can also mean that once mixed, you need to work fast. Trust me when I tell you that time can move much quicker when you are under a drying deadline with the glue. Last thing you want is it to start to harden before you are ready.
CA Glue – My Most Used Glue
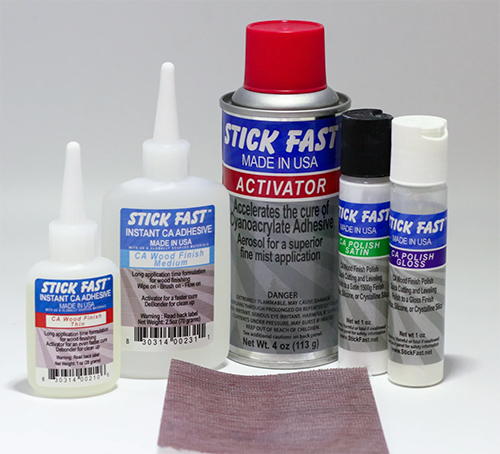
Cyanoacrylate glue is a must for woodturners. Commonly known as super glue, CA is a fast-drying glue that can both protect your project and enhance it. While you can use certain activators that will offer instant drying, CA dries rather quickly, to begin with, though safety measures must be taken as it can leave chemical burns as well.
Cyanoacrylate glue dries into a plastic-like coating, which can both protect and enhance what you are working with. This can allow you to make a delicate piece without sacrificing the stability of it. This is most evident in pen turning. I use CA glue in all my pen finishes. It leaves a really nice glass-like finish. There is a complete system and method of finishing turned pens with CA glue.
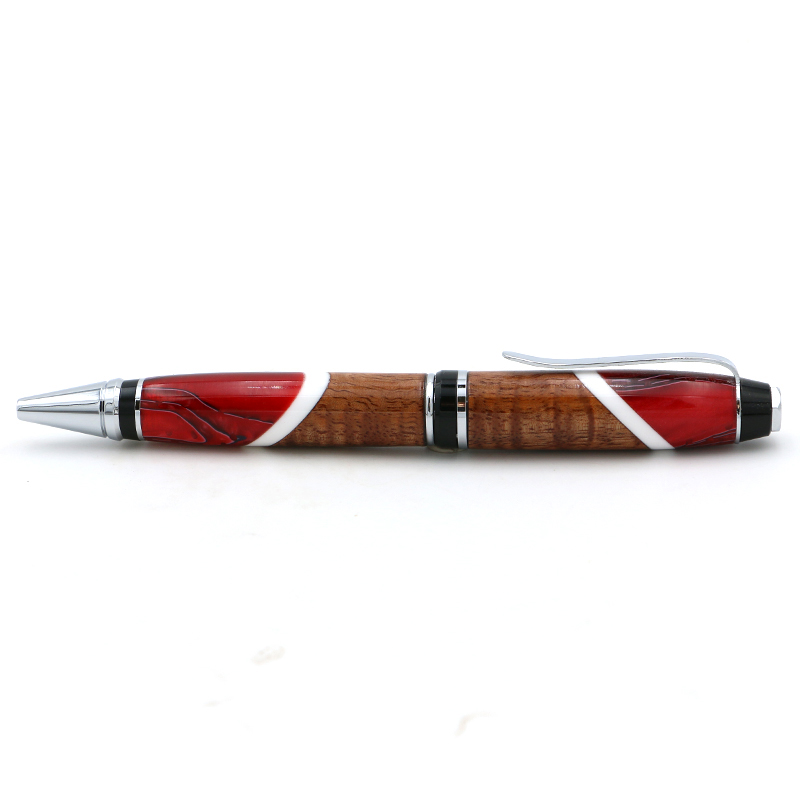
Cyanoacrylate glue can also be used as a gap filler and to bond pieces together. For example, this is my go-to glue when I’m doing small segmented pieces like pens. I use CA glue to adhere the wood blanks to the acrylic inlays as demonstrated in the photo above.
Like epoxy, CA glue is also good for a quick fill whenever I run into small cracks or insect holes when I’m turning a bowl or spindle. CA glue comes in three consistencies, thin, medium, and thick. To fill a crack, I mix a small amount of sawdust with medium CA and fill the void. Once it dries it can be turned or sanded down. Below is an example where I filled a termite hole.

Glue Gun – Saves Me From Wasting Good Wood
I work a lot with Koa wood, which is very expensive. And if you turn wood you know that there is a substantial amount of waste at the bottom of the piece because of having to make a tenon (which is often discarded) to use with a chuck. Or if you are screwing through using a faceplate, you have to discard the portion that has screw holes. However, by taking a sacrificial piece of wood and hot gluing it to the bottom, you add length to your blank and save the actual workpiece. When working with Koa wood, this method allows me to make the most of the Koa wood blank as possible.
Now although this method works best for small bowls and such, I would not recommend doing this with heavy large or hollow vessel pieces. The hot glue is strong, however, there are limits.
Safety Measures While Working with Wood Glue
While I share the main variety of wood glues I use and their uses, I also want to address that safety is important. Whenever you are working with chemicals, including glues, make sure to wear the appropriate PPE (Personal Protection Equipment) to prevent injury as glues can cause damage to the delicate human body.
Some glues, like cyanoacrylate glue, can put off fumes that can damage your airways or burn your eyes if you are not careful. I often take breaks for fresh air when working with these adhesives. The quicker the glue dries, the more precautions should be taken against it. Even for the PVA glue, neoprene gloves should be worn to protect your skin.